
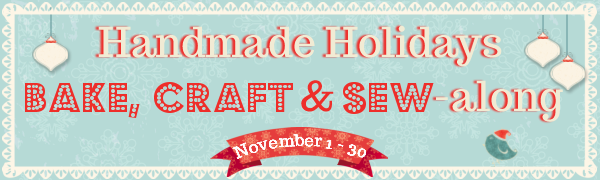
Welcome to the last day of the Bake Craft Sew Along! Today is the last day of our series if you love to sew then you won’t want to miss a day of sewn handmade gift ideas. According to Kelly is featuring gifts that can be crafted and A Southern Fairytale is sharing recipes perfect for making edible gifts! Don’t forget to enter our SEW Amazing Giveaway. Just visit Molly Flanders today.
I am so delighted to be participating in Skip To My Lou’s Handmade Holidays Sew-along! And even more excited to share a fun Holiday inspired pincushion! This would make a great gift for all your stitchy friends!peppermint pin cushion, sewing tutorials, handmade gifts

Technique: English Paper Piecing
Supplies: you should have enough materials here to do several pincusions
1/8 yard of two fabrics to the swirl top of the pincushion
1/8 yard of fabric for the side of the pincushion
one fat quarter or a 1/4 yard of fabric for the bottom circle
fiberfil stuffing for filling the pincushion
DIY button covers or your favorite buttons
2/3 yard of trip (optional)
freezer paper (optional)
hand needle
thread
sewing machine
straight pins
Directions:
1. Begin by copying the swirl template. My template measures about 2 5/8 inches from top to tip. And about 1 3/8 inches wide at the widest point. You can increase or reduce the size of the template on your printer and adjust fabric requirements.

2. Once you have the swirl copied, trace 12 swirls onto the paper side of freezer paper and cut out on the drawn line. I like to use freezer paper and press my template onto the wrong side of my fabric, then baste. Note: the freezer paper keeps everything nice and neat, but if you would rather make your swirls out of scraps of paper, that works too!
As you can probably see, we are getting ready to do a little English Paper Piecing with our swirls. If you are not familiar with EPP techniques, visit my friend Clare’s blog for a quick tutorial! You can find it here
3. Press 6 freezer paper swirls onto the wrong side of your first fabric (I used the red stripe fabric) and 6 freezer paper swirls onto the wrong side of your contrasting fabric (my text fabric). Cut the fabric around the swirl template leaving a 1/4 inch seam allowance. Wrap the seam allowance around to the back side of the template and baste in place. Repeat for all 12 swirls.

4. Using your hand needle and thread, stitch the swirls together, alternating a stripe swirl and a contrasting swirl. Take care to match the ends and ease in the fullness in the middle. English Paper Piecing on a curve can be a bit tricky. Note: it is easier to stitch with the concave piece facing you.

5. When you have finished stitching all 12 swirls into a circle, press your pincushion top well. Note: the very center will have a small area where the points come together that is not completely stitched. This area should not be any larger than your button, but you can take a few small stitches to pull that area closed. Remember it will be covered by the button.
6. Now it is time to take the papers out of your pincushion top. First snip all of the basting stitches, and then gently pull the papers out. Remove any stray threads. Make sure you keep the seam allowance around the circumference of the circle pressed under.

7. To make the bottom template of the pincushion, I simply traced around the edge of the top. You can measure the radius (center) and use a pencil compass to trace a circle, but I took a much easier approach and just traced around the circumference of the circle onto a piece of computer paper. Cut out your bottom circle template and trace or pin to the wrong side of the bottom fabric. Cut the bottom circle out on the drawn line.
8. For the side strip, I cut a piece of fabric 1 1/2 inches wide by about 17 3/4 inches long. To find the length for the side piece, measure across the center of your pincushion top. Now multiply that measurement by 3.14. Next, add .5 inches for your seam allowance. You can round this to the nearest 1/4 inch. It doesn’t have to be a perfect fit since you will ease in any fullness.

9. Take your side strip and using a 1/4 inch seam allowance, stitch the two short ends together (right sides facing) – to make a circle.
10. Pin the side circle with right sides facing to the top of the pincushion. Ease in any fullness.

11. Stitch around the entire top using a 1/4 inch seam allowance. Back stitch at the beginning and the end.
12. If you would like to add a trim to the tip of the pincushion, add it now before the bottom is attached. Note: Another option for the trim is to sandwich it between the layers of the tip and side before you sew the tip and side together. This would work for ball fringe or rik rak.
13. Pin the bottom circle of the pincushion to the top and side unit. This will be pinned and stitched in the same manner as the top. ***The only difference is, you want to leave a 2 inch opening to turn the pincushion right side out!***
14. Stuff your pincushion full with fiberfill and stitch the opening closed with a hand needle and thread.
15. Add a button to the top center and one on the bottom center. Pull the buttons tight to create a puffy little peppermint pincushion!
Happy Holidays!
SEW Amazing Giveaway worth over $1000
Stop by Molly Flanders for more sewing inspiration and to enter the SEW Amazing Giveaway today (you get a new entry everyday)! I am giving away more than $1000.00 worth of sewing goodies! You won’t want to miss this!

The post Peppermint Pincushion by Molly Flanders appeared first on Skip To My Lou.